Microadventures: Epic Escapades to Shake Up Your Routine

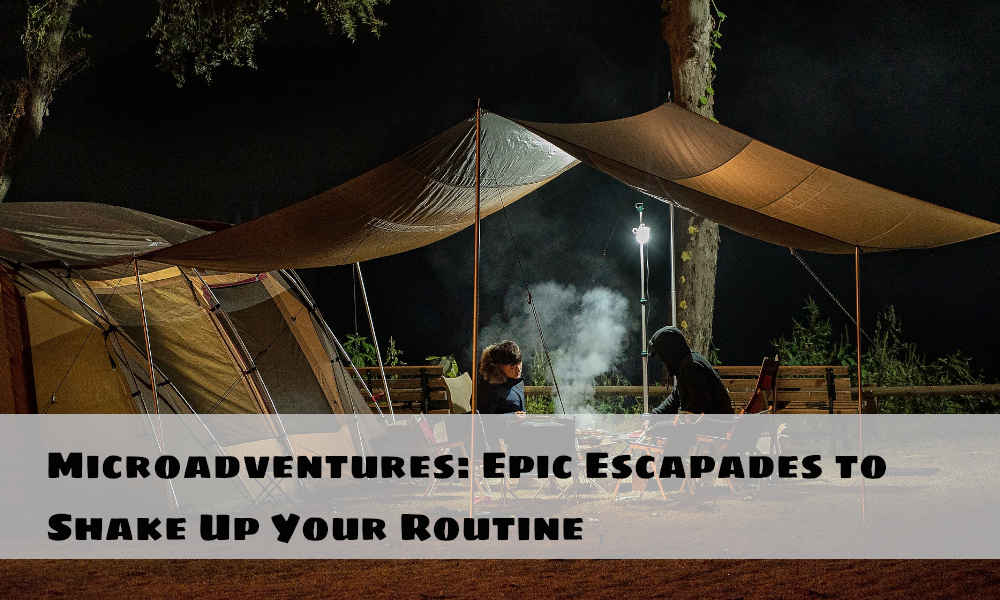
Microadventures: Here’s the thing; most Americans that work full-time get two weeks of paid vacation per year plus 8-10 days of paid national holidays. Three and a half weeks of time off per year is hardly enough to satiate any remote thirst for adventure. While it’d be nice to get set away to the crystal-blue waters of the Maldives or sample every kind of cheese in France, the reality is that we can’t all travel all of the time.

microadvantures

This means weekends have become crucial components of appeasing the wanderlust dragon that lives inside of us all. We’ve found that micro adventures do a phenomenal job of breathing vitality into our weekends, keeping us active, getting inspired, and giving the same “good vibes” we get when we travel.


What is a Microadventure?

Microadventures can be thought of as mini travel excursions or camping trips with slightly different air. The New York Times described microadventures as “short, perspective-shifting bursts of travel closer to home, inspiring followers to pitch a tent in nearby woods, explore their city by moonlight, or hold a family slumber party in the backyard.”

Microadventures encourage us to see our stomping grounds differently and appreciate what we already have around us. You don’t need a ton of supplies to get started, and you certainly don’t need to spend a fortune to have one. All you need is an easygoing attitude, a sense of exploration, and one night.

The term got popularized by an enigmatic person named Alastair Humphreys, who believes that adventure is “accessible to normal people, in normal places, in short segments of time and without having to spend much money.” Microadventures are loosely defined, but generally, they are held outdoors and overnight. You can sleep in a bivvy bag (individual waterproof shelter), tent, or under the stars in blankets or a sleeping bag.

Humphreys also champions the idea of doing a “year of microadventures,” where he suggests different pursuits that can take place all year long, such as watching a celestial event, taking someone else on their first micro adventure, or swimming in wild water (which he is a big fan of).

The concept of microadventures is attainable and appealing to many people who are looking to challenge themselves and have more meaningful experiences with their weekends. It offers a way to break from the mundane routine of running errands, going from store to store, binge-watching TV series, and eating at overpriced restaurants. Despite living in the buzzing suburbs of Silicon Valley in California, full-time workers can still enjoy microadventures. There are many reasons why microadventures are worthwhile, making them a great way to enhance one’s life.


Are you sure anyone can do Microadventure?

Microadventures are simply about normal people with busy lives that work the 9-5 but want to make the most out of their 5-9. It’s about getting outside and reconnecting with yourself on a regular basis. Microadventures are for you and for anyone who wants to come along. The word adventure is defined as an experience that is exciting, unusual, or unknown. It can be anywhere, which means your very own backyard may be full of opportunities for exploration.


Microadventures are the sisters of travel

Microadventures and travel share many similarities, including a period of research to figure out where to go, preparing necessities such as gear and groceries, building community with friends and meeting new people, and taking a bold step into the unknown with new experiences. The entire experience of microadventures and travel, rather than just the destination, can be exhilarating.

One of the benefits of travel is the opportunity for deep self-reflection, creativity, and disconnecting from the need to constantly be online. Microadventures can also provide the same opportunity to disconnect and live in the moment, much like travel. When you say you are going on a microadventure, it’s understood that you will be offline and engaging in a new activity.


How a Microadventure can become so much more

If you find yourself constantly attached to technology and feeling overwhelmed by the need to constantly be online, microadventures could be the perfect solution for you. Initially, the idea of camping with friends and family was just for fun, but it quickly became a way to disconnect from technology and rediscover the joys of spending time outdoors.

Microadventures allow for a sense of purpose during weekends, whether it’s preparing for the next trip, going on adventures, sharing photos, or unpacking from the excursion. It’s an opportunity to spend quality time with loved ones and create unique memories.


How should I start?

If you are ready to get going, here are some microadventure ideas. You can try one first to see how you like it (you will, we promise), or you can dive into the deep end and create your own one-year challenge.

  • Live in an apartment? Sleep outside your balcony.
  • Pitch a tent or cozy den in your (or a friend’s) backyard.
  • Camp during the workweek (we recommend Thursday night).
  • Bring a friend who’s never gone camping before.
  • Bring a new friend that you’ve just met.
  • Watch a celestial event or a special moon.
  • Sleep near a body of water.
  • Sleep on a hill.
  • Try a small backpacking trip.
  • Bring a plant book and identify the things you see.
  • Bring your parents, kids, and siblings.
  • Have a board game bonanza.
  • Host foil packet food competitions.
  • Do nighttime photography.
  • Invite friends to celebrate your birthday with camping.
  • Create a glamping experience.
  • Plan an all-girls or guy’s trip.
  • Go solo.
  • Surprise your partner with a romantic dinner.
  • Camp in the rain (with proper waterproof gear).
  • Bring your pets inside the tent.


What kind of rules should I set for the challenge?

The beauty is that there really are no rules; craft a plan (or no plan) that works well for you, and have a blast. If you do decide to create rules or guidelines for yourself, just remember that you are doing this for fun. No need to force yourself to do anything that will make you miserable.

As an example, our one-year microadventure challenge was:

  • Sleep outside.
  • Eat a meal.
  • Create a unique experience or twist each time.
  • Don’t travel any further than 4 hours (one way) by car.
  • Go once per month.
  • Go forth and be an adventurer.


Whatever you decide to do, don’t forget that adventure is for everyone. You might just surprise yourself by shaking up the norm and spending your weekend a little differently. Keep it simple, don’t overthink it, and don’t put too much pressure on yourself to plan out every detail. Embrace the unknown, and you will capture the essence of excitement that you’ve been looking for. Last, of all, don’t forget to tell us all about your microadventure plans in the comments below!

Check 10 Golden Tips for Traveling Smarter and 52 Creative Ways to Save Money for Travel, which help you more on your future travels.

Embark on an Epic Adventure: The Quilotoa Loop Packing List You’ll Ever Need for a Successful and Memorable Trek!

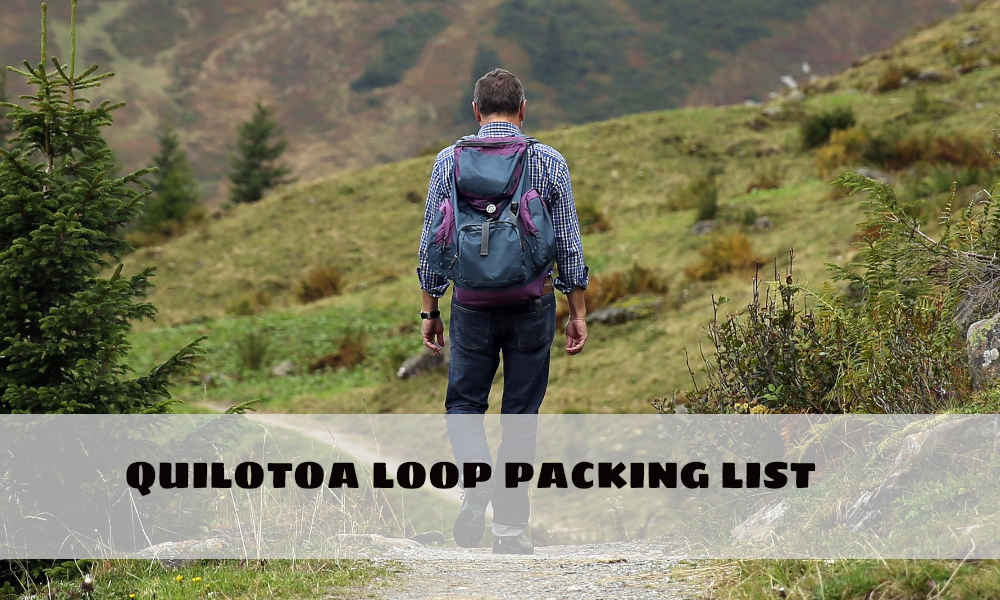
Quilotoa Loop Packing List: The Quilotoa Loop is an incredible way to immerse yourself in the breathtaking highlands of Ecuador’s Andes Mountains. Connecting with nature and rural areas while traveling can add a unique layer of experience to your journey. It’s like savoring every layer of a cake rather than just the toppings.

If you’re interested in learning more about seeing one of the most exquisite crater lakes in South America, check out our comprehensive Quilotoa loop guide on this 3-day trek. It is a wonderful journey for new and experienced trekkers, can be completely self-guided, and the views are stunning.

QUILOTOA LOOP PACKING LIST

Quilotoa Loop Packing List

Our packing list is not for the minimalist trekker. It is for the type of adventurer who would like to be thoughtfully equipped for any situation. Noted certain items as optional, with the intention that these items could make the overall experience more enjoyable.

Ideally, you’ll want to keep your pack as light as possible– less than 10 lbs (or 4.5 kg) is a good place to be. This is particularly important if you are a beginner trekker. After some time, every ounce of weight on your back begins to feel like a ton of bricks! Remember that you may not end up using everything (first aid, safety whistles, GPS, etc.), but in those rare instances, they may also save your life, and you’ll be thankful you brought it.

Travel Necessities

  • Printed Quilotoa Loop trekking guide (if possible) or phone screenshot
  • Travel Insurance
  • Enough cash for all accommodations and snacks (US Dollars)

Electronics

  • Travel adapter
  • Chargers and cables
  • Smartphone – Airplane mode on to avoid roaming charges with WiFi on and offline maps for every town pre-downloaded
  • Instructions in point #7 on downloading offline Google Maps
  • Kindle E-reader or book (optional)
  • Headphones // wireless earbuds (optional)
  • Camera (optional)
  • Power bank (optional)

Clothing

Keep in mind that you should be packing mostly athletic, lightweight, synthetic clothing that wicks moisture quickly.

  • Underwear
  • 1 sports bra (women)
  • 2 long-sleeve or short sleeve synthetic shirts
  • 1 set of sleeping clothes
  • 1 shirt to wear at the hostel
  • 1 pant to wear at the hostel
  • 2 pairs of Merino wool hiking socks
  • 1 mid-weight fleece or soft-shell jacket (men’s and women’s)
  • 1 waterproof rain shell (men’s and women’s)
  • 1 hiking bottoms or leggings (men’s and women’s)
  • 1 beanie hat
  • 1 hat with brim or bill for sun protection
  • 1 bandana or buff for neck sun protection
  • 1 swimsuit (optional if you plan on using Llulu Llama’s hot tub)

Trekking Gear

  • 22L to 28L backpack
  • Backpack rain cover (or a rain poncho works well)
  • Hiking shoes/boots with good tread to hike through rain, loose dirt, and mud
  • LED headlamp
  • 5 to 2L refillable water bottle or hydration reservoir
  • Several plastic bags to hold your trash (leave no trace)
  • Signaling safety whistle
  • Compact first aid kit
  • Sunglasses
  • Snacks
  • Trekking poles (optional)
  • Quick drying and lightweight microfiber towel(optional)
  • Sports wristwatch with alarm (optional)

Toiletries (travel-friendly)

  • Daily skin moisturizer
  • Face cleanser
  • Medicine (general assortment)
  • Toothbrush, toothpaste, and floss
  • Shampoo & Conditioner, or pack your own in these reusable bottles
  • Sunblock
  • Comb
  • Contact solution and lens case
  • Deodorant (women’s//men’s)
  • Chapstick
  • Optional: face wipes, q-tips, hair ties, bobby pins, stain remover pen, antibacterial gel
  • Toilet paper/tissues
  • Blister care/moleskin(pre-cut moleskin into small pieces)
  • Electrolyte replenisher powder mix sticks (optional)
  • Small notebook and pen (optional)


In conclusion, having a well-planned packing list for the Quilotoa Loop trek in Ecuador can make all the difference in having a comfortable and enjoyable experience. From appropriate clothing and footwear to essential gear and personal items, each item on the list should be carefully considered and prioritized based on your individual needs and preferences. With the right packing list, you can feel confident and prepared for the challenges and adventures that await you on this stunning trek.

If you have any other questions about the Quilotoa Loop packing list, feel free to drop a line in the comments below.


Unleash Your Inner Adventurer: Quilotoa Loop Trek – A Must-Do Experience for Outdoor Enthusiasts

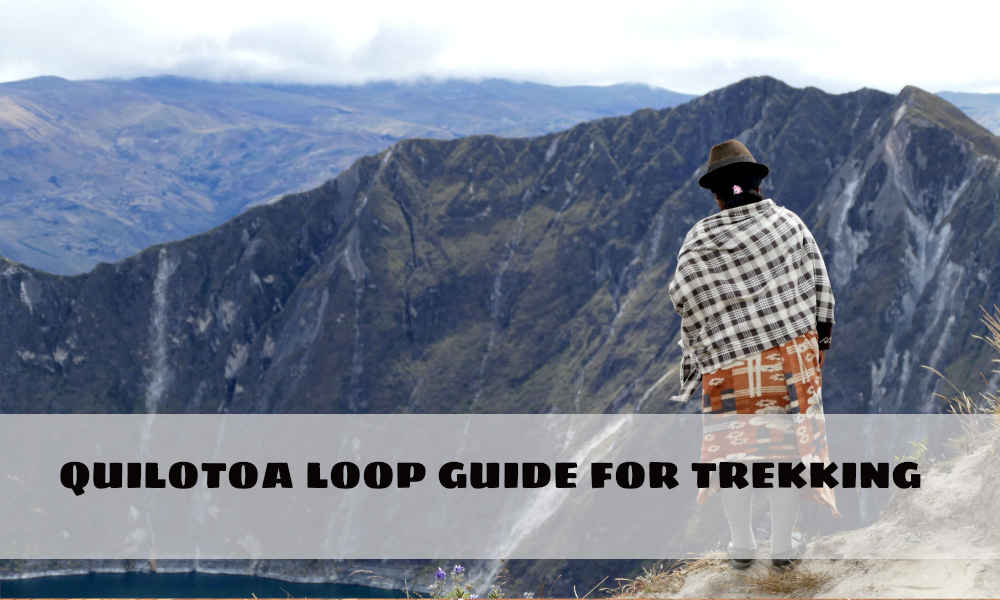
The 3-day Quilotoa loop trek is a short yet powerful journey that weaves through the spine of the Andean Mountain range in Ecuador. It is undoubtedly one of the best ways to appreciate the undulating beauty of the highlands, experience rural landscapes, see simple towns, and take on a physical challenge. This is a great route for trekkers of all levels– from beginners with great attitudes to more experienced folks who have been on world-class treks.

Quilotoa loop trek

There is something soulfully satisfying about taking off a backpack at the end of a trekking day, stretching your legs in a hammock, and eating a hearty home-cooked meal. It’s a special way to connect with nature and appreciate the varying landscapes that each country has to offer. We sincerely hope this is something everyone can experience for themselves. In this guide, we’ll take you through everything you will need to know to plan your own self-guided Quilotoa loop trek in Ecuador, and our Quilotoa Loop Packing List will be handy when you travel.


Thoughts on self-guiding or getting a Quilotoa loop tour guide

There are always pros and cons of self-guiding versus going with a tour company. A tour company can be great if you have limited time to plan, need extra help carrying your belongings, would like explanations on points of interest or natural surroundings, or want to guarantee you’ll be traveling with a group. There are a lot of factors to consider before making this decision.

The Quilotoa loop is a relatively short trek and is simple enough to self-guide– even if you are a first-timer. In order to do so, you will be taking on a small (yet enjoyable) challenge of planning logistics, navigation, and carrying your own supplies. Another perk of self-guiding anything is that you’ll save money and have the autonomy to choose where you stay. We spent only $100 for transportation, lodging, and supplies for this 3-day Quilotoa loop trek.


Cost for the Quilotoa Loop trek for one person

Category Detail Amount
Bus Ride from Quito to Latacunga $2.15
Food Supermarket snacks and lunch $3.25
Taxi Private car ride from Latacunga to Sigchos $25.00
Lodging Hostal Llulu Llama, half board, private twin room $24.00
Lodging Black Sheep Inn, full board, dormitory $35.75
Food Celebratory beer and chicken soup in Quilotoa $5.50
Bus Ride from Quilotoa to Zumbahua $1.00
Bus Ride from Zumbahua to Latacunga $1.50
Taxi Latacunga bus station to Hotel $1.50
Total $99.65

( expense depends on several factors such as seasonal, inflation, date of visit, holiday, etc.)


One of the challenges when planning a Quilotoa loop trek is the limited availability of trail information. Many people have reported getting lost or finding the maps to be unreliable. Avoiding getting lost is crucial, and it is important to gather as much information as possible beforehand, including taking every map available at each hostel and speaking with locals along the way. This guide includes helpful notes gathered from previous research, as well as new insights collected during the trek. It is an invaluable resource for anyone planning a self-guided Quilotoa loop trek in Ecuador, and we are excited to share it with you!

A word of advice: you’ll want to download offline maps (see instructions in point #7 on downloading offline Google Maps) beforehand, and if possible, have a printed guide handy to refer to every step of the way (or save the screenshot on your phone). The Quilotoa loop trail is safe, with the exception of some territorial dogs, which may growl if you get too close to the property line.


Which direction should I choose for the trek?

You can choose to go the traditional (beginning in Sigchos) or the untraditional route (beginning in Quilotoa). While some may argue that going the untraditional route is easier (with fewer ascents), the trek will have difficult moments in either direction. We recommend going the traditional route to end with a spectacular finish at the Quilotoa crater lake. Our guide is written for the traditional route, which goes from Sigchos to Insilivi, then Chugchilan, and ends in Quilotoa.


What is the total distance for the Quilotoa Loop trek?

The first day of the Quilotoa loop from Sigchos to Insilivi is 14 kilometers (km) which are fairly flat with an ascending burst towards the end. The second day from Insilivi to Chugchilan is more demanding than the first due to undulations with an overall distance of 12.4km. The final day from Chugchilan to Quilotoa is 10.3km, which is the most difficult yet rewarding day, with several ascents to yield a drool-worthy view of the caldera. The total distance for the 3-day trek is 36.7km, which is 22.8 miles.


Where to stay on the Quilotoa Loop trek

The Quilotoa loop trek hasn’t become a huge sensation (yet), so it is relatively easy to do walk-up reservations. We personally prefer to reserve in advance for peace of mind, but that is up to you. The town of Insilivi is quaint and has only two places to stay– Hostal Llulu Lllama and Hostal Taita Cristobal. Currently, the best way to reserve in advance is to email them.

Hostal Llulu Llama is infamous for its relaxing environment and good meals, so you may want to make a reservation if your heart is set on staying there. Chugchilan has many more options, including the creative ecolodge we stayed at called Black Sheep Inn, as well as Hostal El Vaquero, and Hostal Cloud Forest to name a few.

If you decide to spend an evening in Quilotoa after your trek, there are also numerous accommodation options available. Otherwise, you can return to your lodging in Latacunga by taking a bus that runs from Quilotoa to Latacunga. Wifi is available at certain locations in Chugchilan and Quilotoa but may be harder to find in Insilivi.


Quilotoa loop weather

During our three trekking days, the sky would quickly change from moody clouds to piercing sunshine, flip over to light rain, and end with brisk evenings. In Ecuador, the dry “winter” season typically occurs from June to September, and the wet “summer” season runs from October to May. It’s best to prepare for all elements by bringing multiple layers, sun protection, and always having a rain jacket or poncho handy. You will not encounter any snow.


Staying well-fed and hydrated during the trek

On the first day of your trek, you’ll want to set off with your meal and water supply. Latacunga has a large mercado or supermarket conveniently located next to the main bus terminal. This is a great place to buy your lunch fixings, such as nuts, granola bars, or ingredients to make peanut butter and jelly sandwiches (such as we did). Depending on how much water you typically drink, it is a safe bet to bring 1.5 to 2 liters with you, as there are very few opportunities to buy more supplies along the route.

Most of the accommodations along the Quilotoa loop offer half-board, which means dinner and breakfast are included in your stay (the food at Black Sheep Inn is phenomenal). Some of the lodges will also include or sell bagged lunches. If you want to save money, it is best to buy your supplies beforehand.

.

What should I pack for the Quilotoa loop tour?

You don’t need anything special besides your legs, positive energy, and sense of adventure for this trek (although some specific items will ensure your experience is a lot more comfortable). We got a lot of use out of our trekking poles on days 2 and 3 because they had some serious incline and muddy landslide areas.

The most important item you’ll want to have is a good pair of athletic shoes to help mitigate blisters and twisted ankles. Ultimately, you will want to carry as little weight as possible to make the journey more enjoyable. You will also want to bring enough cash to cover all lodging and food, as there are no ATMs. We’ve written up a comprehensive Quilotoa loop packing list which will help get you prepared for this epic experience.


Is altitude sickness a factor?

Quilotoa’s elevation is marked at 12,841′, which is 3,500′ more than Quito (the second highest capital in the world just underneath La Paz, Bolivia). There’s a chance you may experience altitude sickness depending on where you are coming from. If you are traveling from the coast, such as Guayaquil where the elevation is 13′, you will want to give yourself several days of acclimatization in the highlands before setting off on the trek.

Another option is to bring altitude sickness medicine which is available by prescription. We chose to take altitude sickness medicine because we traveled from California to Ecuador the day before we started the trek and didn’t want to take the risk. You should be fine if you are traveling from Quito, as the altitude gain on days 1 and 2 of the trek is fairly modest.


Situate yourself in Sigchos or Latacunga the day before you begin the trek (traditional route)

The Quilotoa loop trailhead is located in the small town of Sigchos. It is possible to stay there overnight, but there are limited options for lodging and restaurants. Expect a very quiet evening if you do stay in Sigchos. Most people choose to stay in the city of Latacunga, which we recommend doing. You should be able to store your luggage at your lodging in Latacunga (some places charge a daily fee, such as Hostal Tiana), move your essentials over to a backpack, and trek with only the items you’ll need. Latacunga is an enjoyable place with several lovely churches, museums, and a small outdoor marketplace, and it easily connects via bus to other nearby cities (including Quito).


How to get from Latacunga to Sigchos

You can take a 2-hour ride on the public bus (departure at the main Latacunga bus station) to get from Latacunga to Sigchos for $2.00 or so. If you ask politely, Hostal Tiana has a copy of the trek instructions and the bus departure timetable that they can provide to you. Most days, the bus departs at 9:30 am, which is an excellent time to set off for your first day of the trek.

If you happen to be traveling on a Sunday, keep in mind the timetable may be drastically different. We were unpleasantly surprised to learn there was no 9:30 am departure that day and ended up making the decision to take a $50.00 taxi ride all the way to Sigchos instead of waiting for the next departure at 11:30 am.

Note: In the event of an injury or in the off-chance that you do not want to continue the trek, there are buses available between Chugchilan and most cities, as well as Insilivi and Latacunga. Your hostel should be able to help arrange rides if needed.


Quilotoa loop Itinerary

The day before the trek: Travel from Quito to Latacunga by public bus (they frequently leave every 20 to 30 minutes from Quito’s Quitumbe station) which costs $2.15 and takes 90 minutes. Spend the evening in Latacunga and leave your luggage at Hotel Endamo.

Quilotoa loop day 1: 90-minute taxi ride from Latacunga to Sigchos. Trek from Sigchos to Insilivi; overnight at Llulu Llama.

Quilotoa loop day 2: Trek from Insilivi to Chugchilan; overnight at Black Sheep Inn.

Quilotoa loop day 3: Trek from Chugchilan to Quilotoa. Take a 20-minute public bus ride from Quilotoa to Zumbahua, and take a 70-minute connecting bus ride from Zumbahua to Latacunga; overnight at Hotel Endamo.


Complete Guide for Traditional Quilotoa Loop Trek (beginning in Sigchos)

Quilotoa Loop Trek

We recommend you use google maps for more accurate and up-to-date data.

Day 1: Sigchos to Insilivi // 14 km // 3 – 4 hours of active trekking time

Generally flat road conditions with one challenging ascent towards the end of the day. The route is marked with signposts and spray-painted colors.

  1. The trailhead can be challenging to find, as there is no trekking marker that is clearly visible in the town. First, you will want to identify a large sign that shows the direction for Chugchilan 25 km ahead) and Parroquia Insilivi (14 km to the left). This sign is located on the “open” edge of town. As Sichos is surrounded by hills on three sides, look for the only side that does not have a hill where the sign is located.
  2. Once you have found the large sign, walk left towards Insilivi where the paved road becomes dirt and descends. After a few minutes of walking on this road, you will see several signs clustered for Hostal Llulu llama, Hostal Taita Cristobal, and even one for Hostal Cloud Forest, pointing to the path on the right.
  3. Continue to follow the road, where you will pass a white church painted with red trim and two red crosses on top. Keep trekking, passing the first side path (unmarked) on the right until you see another trail on your right-hand side that is marked with a smaller cluster of signs for Hostal Llulu llama and Hostal Cloud Forest, where you will turn right. After 7-10 minutes on this path, you will need to look to your left for a small footpath in the grass that is unmarked. Some people have stacked a small pile of stones to indicate the path, but it is entirely easy to miss, so be vigilant. This small path descends into the valley and will eventually take you to a road.
  4. Upon reaching the road, turn right. You will continue down the road following a slight left-hand curve, then a right curve until you see another left-hand curve with a small path jutting off of it. The path has a barbed wire fence alongside it, and you can also confirm this is the correct path because, just a few steps into it, you will see a fence post (thin tree trunk) that has been spray-painted green, orange, and white.
  5. Continue along this path until you reach a road and turn right. Continue trekking for about 30 minutes with the river on your left-hand side until you reach two small homes; one with brown walls and the other (slightly smaller) with grey cinder block walls and a small white shack attached to it. Near these homes, you will also see a red and yellow trail post pointing to Insilivi.
  6. Take the small descending grassy footpath that’s located directly to the right of the two homes. This path will take you down to a river and a concrete bridge. **There’s a chance there may be a person standing at this intersection demanding some money to use the path (this happened to us). It does not cost any money to trek the Quilotoa trail, so politely refuse their request and keep on the path.
  7. Walk across the concrete bridge, turn right, and then just 20-30 meters; then you will see a footpath on the left marked with several spray-painted rocks along the way. This path will take you into a steep ascent up a muddy (depending on the season) path until you reach a dirt road, which you will turn left on.
  8. Follow the road for another 20-30 meters, where you should see a small intersection with several houses and farms. There will be a spray-painted marker indicating that you should turn left here (although if you go right, you’ll quickly realize you’re walking into someone’s farm).
  9. Continue on the path that is marked with red and yellow spray paint until you reach a small school with a basketball court and a white building with metal bars over the windows. Turn right at this intersection, and about 20 meters after this; you’ll see a small trail to your right with a concrete column that has been spray painted with the number 7, a llama, and a star. Take this trail to your right, and you will begin ascending with switchbacks.
  10. This ascent is the most challenging part of the day and can take anywhere between 40 minutes to an hour, depending on your trekking speed. The path is straightforward and marked with spray-painted rocks along the way. You will encounter two smaller paths shooting off on the right-hand side, but just ignore these and continue along the main route until you get to the top of the hill and reach a large road.
  11. Turn right onto the large road and pat yourself on the back. The hardest part of your first day is now over! Continue walking on the road for another 45 minutes until you reach the tiny town of Insilivi. As soon as you enter the town (easily identifiable by the large brick church straight ahead), take the first road on your right. If you walk up to the church doors, you’ve already gone too far. You will see Hostal Taita Cristobal at the T intersection (and Llulu Llama if you turn right at the intersection). The two accommodation choices are just steps away from each other.


Day 2: Insilivi to Chugchilan // 12.4 km // 4 – 6 hours of active trekking time

Steep descent the first part of the day, undulations, one challenging ascent, then the day ends with a walk on asphalt into the town of Chugchilan. The route is marked mostly with spray-painted colors and few signs.

  1. The trailhead begins adjacent to Hostal Llulu Llama’s kitchen. Descend down this path and then turn right onto the road after 20 meters. Keep descending until you begin to see a concrete bridge at the bottom of the valley on your left-hand side.
  2. Go across the concrete bridge and continue walking 200 meters, where you will see a trail on your right-hand side that is ascending. Take this path until you reach a dirt road, where you will turn right. Continue for 2km until you see a red and yellow trail sign pointing to Chugchilan where you will turn right. **It should take about 20 minutes from the time you cross the concrete bridge to the time it takes you to get to the Chugchilan sign.
  3. Continue trekking along this path for about 15 minutes until you get to an interesting section where white cliffs flank both sides, and the trail is wide and dusty. Continue walking through the “white cliff walls” for 5 minutes, and you will see a house and a red and yellow signpost directing you to turn right towards Chugchilan. Take that path which will be narrow, and begin to descend.
  4. The trail begins to reveal more adventurous sections with muddy terrain, narrow passageways, and also massive plants. After walking about 15 minutes along this path, you should see another red and yellow signpost directing you to Chugchilan. Continue this way until you reach the base of the mountain.
  5. At the mountain base, the path appears to fork in several directions. Simply go straight across the small muddy ditch (go off the trail to do this if needed), where you should see the path converge again. Walk several steps until you see another fork with marker indications (spray-painted trees) to go right. The correct path will descend slightly, while the incorrect path on the left will ascend.
  6. After 25-30 minutes of continuing along the trail, you will encounter a wooden gate. Pass through this gate and continue along the path where a large farm will be on your right-hand side. You’ll pass through another “gate” made of barbed wire (the wire has since been trampled and is on the ground, so it may not look like a real gate per say).
  7. Keep going on the trail for 1.1 km, where you will see a tall boulder (about 7 feet high) on your left-hand side. During the majority of this time, the Rio Toachi River will run on your right-hand side. Continue along the trail until you see a small grove of eucalyptus trees which you will walk through until you reach a log bridge that spans across the Rio Toachi River.
  8. The log bridge is highly noticeable, with multiple signs for Hostal Cloud Forest on it. Carefully cross the log bridge. Immediately after crossing, you should see a sign for Hostal Cloud Forest, which has been nailed to a tree. Follow the sign and take the path to your left towards Chugchilan. The Rio Toachi should now be situated on your left-hand side.
  9. Continue straight on the trail past the suspension bridge on your left (do not cross), and the path will begin a gradual ascent for the next kilometer. At this point, you will see a wooden shack with a small sign selling snacks and drinks on the outside of it. Turn left on the road in front of the store and head towards the small town of Itualo, which is easily recognizable by a beige and red church and cattle area next to it. As you come closer, you will also see other small buildings, stables, and a school.
  10. Walk past the church, and you will see a path leading up toward the mountain with a wooden sign for Hostal Cloud Forest and Chugchilan on your right-hand side. This trail will take you all the way up and over the mountain, making this ascent the most challenging of the day. The ascent will take anywhere between 35-45 minutes with a distance of 750 meters.
  11. At the top of the mountain, you will face an intersection with a few sparse buildings and several signs pointing in various directions. Turn left and continue on the path (if you turn around 180 degrees, you will also see a sign behind you pointing to Chugchilan). The trail flattens out, and you will continue walking for 1.3km, past a U-shaped cliff of white rock and a beautiful view behind it. This is a great photo opportunity and snack spot.
  12. Continue along the trail, which is marked with spray-painted rocks, and go past a wire fence area on your left-hand side until you reach asphalt road, where you will turn left. At this point, the rest of the day’s walk will be on asphalt. You will see a large official welcome sign for Chugchilan directing you to continue forward into the town. Most of the accommodations in Chugchilan are located directly off of the main road, so as you keep walking in (with a gradual ascent), you’ll come across Black Sheep Inn first, then Hostal Cloud Forest, then Mama Hilda’s, and so on. Hostal El Vaquero is located at the very end of the town (which is also the starting point for the next day’s trek).


Day 3: Chugchilan to Quilotoa // 10.3km // 5.5 – 6.5 hours of active trekking time

A steep descent from the town of Chugchilan down to the river with interesting scenery and diverse terrain. Challenging ascent on a narrow path with slight scrambling over landslide areas. Pass through Guayama San Pedro, with more ascents towards the crater and into Quilotoa town. The route is sparsely marked, with the exception of general signs for Quilotoa. If you are traveling during rainy weather, be sure to check with other trekkers or people at your accommodation for trail conditions beforehand, as there are several steep areas that are prone to landslides.

  1. The trailhead begins near Hostal El Vaquero, which is located on the other end of town (from where you entered Chugchilan the day before). If you are beginning from Black Sheep Inn or Hostal Cloud Forest, it is approximately a 15-minute walk to El Vaquero. Continue along the main road through town. You will see various signs pointing to the left of the hostel near the biblioteca (library). Once you reach Hostal El Vaquero, walk a few steps past it towards the large blue sign that says “Quilotoa – 10.24km”.
  2. Follow the Quilotoa sign and take the path on your left-hand side. For the majority of the day, you will continue to follow signs for Quilotoa, as there will be relatively few trail markers similar to the ones you had seen on days 1 and 2.
  3. Continue on this road until you see a yellow wooden sign that says, “La Moya, Cascada, and Quilotoa – 11km”. At this point, take the small trail on your left-hand side, veering off of the main road you were just walking on. This narrow trail will take you on a descent through tall grass and then up to a yellow farmhouse. Just a few steps past the yellow farmhouse, the path will curve slightly to the left and you will see a wooden sign on your right-hand side that says Hostal Cloud Forest directing you to turn right towards Quilotoa.
  4. This path will continue to descend until you eventually reach the river at the bottom of the valley. As you get closer to the river (which should be on your right-hand side), the terrain will drastically change from a trail to a sharp, switchback descent on loose sand and dirt. Trekking poles are especially useful here to maintain some balance as the footing is tough (also try sidestepping if you are slipping). This narrow path will take you all the way down to the river and directly to the makeshift wooden bridge that you will cross.
  5. After you cross the river, follow the trail for a few minutes, which veers to the left until you see a green sign that says “Quilotoa – 8.2km”. From here, you will begin ascending for the next 40 – 50 minutes until you summit the mountain ahead. About one-third of the way along the trail, there is a cluster of picnic benches and a trash can which is a good location for a rest stop.
  6. There is only one trail in this section, so continue climbing up with special caution for your footing in areas where there have been landslides. You may need to do slight scrambling over rocks depending on the trail conditions. At the summit (woohoo), there is a bench overlooking the area that you’ve just trekked through. This is another great spot for a water break or snack. You’ll see another green sign which states, “Quilotoa – 7.7km,” pointing to the left.
  7. Follow the Quilotoa sign to the left, which is headed for the town of Guayama (pronounced Waima) San Pedro. While this shouldn’t be an issue as long as you are on the correct path, you may want to be aware that there is another town nearby, also called Guayama Grande. Continue on the trail towards the town, and the road will gradually curve left. As you get closer, you should be able to see a giant blue awning in the town. Hike to the large blue awning in town, ignore the first right-hand turn, and walk a bit further until you see the basketball court and make the second right.
  8. Continue to walk through the town of Guayama San Pedro, passing through the first intersection until the road begins to ascend gradually. When you reach the second intersection, you should see a green building with red trim and a brown sign that points to Chugchilan towards the right. You will turn left here and walk until you see a sign stating, “Quilotoa – 4.75km”.
  9. Shortly after the sign, take the first trail on your right. As the road continues uphill and out of Guayama San Pedro, you will be able to see a hostel on your left. At this point, the trail becomes uneven and passes several farms on both sides. This next ascending section takes 30-40 minutes until you reach the dirt road. Along this route, you will encounter a fork with three paths. We recommend taking the left path (the middle path gets you to the same trail but makes you ascend a bit more). Continue on until you reach a large dirt road, and then turn left.
  10. Keep on the trail for about 15 minutes, where you will see a small unmarked footpath on your right-hand side going up the hill. Ignore this path and walk another 5 minutes until you see another small unmarked footpath on your right-hand side that also leads uphill on a grassy area. This turn is very easy to miss and is unmarked, so be on the lookout (picture below)! From here, it will take approximately 40 minutes to the next sign.
  11. As you continue to ascend on this trail, you’ll pass farms and a garden on your right-hand side with barbed wire fencing. Keep trekking uphill until you reach the fork before the trail flattens out. Take the path on the right, and it should lead you to a large sign that states, “Quilotoa – 2.9km”. The trail should now be made of white grainy sand.
  12. Follow the sandy trail, which will eventually begin to veer left. At this point, know that you are very close to the crater lake (drumroll please). You will go on another small ascent which takes you right up to a breathtaking view of the Quilotoa crater. This is a great spot to let out a huge sigh of relief and take a smiling selfie!
  13. If you are facing the crater, the town of Quilotoa is located diagonally ahead on your right. You will want to turn right and take the path that circumvents the top of the crater lake all the way to Quilotoa. This route will continue to yield stunning views of the caldera, so you will have plenty of opportunities to take photos from different angles. As you exit the crater lake area, there are a few smaller ascents and one particular area affectionately called the “path of death” (coined by a tour guide we met along the way), where the trail is extremely narrow. Traverse this section carefully.
  14. Once you reach the town of Quilotoa, treat yourself to a congratulatory drink or meal! If you are wiped out from the trek, there are plenty of places and accommodations to choose from. Quilotoa is also a great place to buy souvenirs, as there are many vendors selling blankets, ponchos, and other handmade goods. Great job on finishing the 3-day Quilotoa Loop trek. It’s time to #treatyoself.
  15. Buses heading back to Latacunga or the town of Zumbahua (where you can take a connecting bus to Latacunga) run regularly until the evening. It’s worth noting the buses to Latacunga run less frequently, so you may need to connect through Zumbahua depending on your departure time (which is what we ended up doing and was easy enough). The direct bus from Quilotoa to Latacunga should cost about $2.00, Quilotoa to Zumbahua should cost about $1.00, and Zumbahua to Latacunga should cost about $1.50.


The Quilotoa loop trek is a wonderful way to see Ecuador differently. We’ve written this guide in hopes that you will find positivity in the Andes Mountains and enjoy the experience as much as we did! If you have any other questions about the trek, feel free to drop them in the comments below.

The Vietnam 16 Day Itinerary: A Journey through Culture, History, and Nature

Vietnam 16 Day Itinerary: Vietnam is a country full of fascinating history, stunning natural landscapes, delicious cuisine, and friendly people. With the Vietnam 16 day itinerary, you can explore some of the best destinations that this Southeast Asian gem has to offer. This itinerary will take you on a journey through Vietnam’s diverse regions and cultural heritage. Whether you’re a history buff, a foodie, or an adventure seeker, this itinerary has something for everyone. So pack your bags, put on your explorer’s hat, and get ready to discover the beauty of Vietnam.

Follow along on our 16-Day Vietnam travel Itinerary during May with listings of each place that we stayed at. If you have Galapagos Islands on your bucket list, you can also read our guide on Galapagos Islands Itinerary – 7 Days Travel Plan.

Vietnam 16 Day Itinerary

Day 1: San Francisco – Taiwan – Saigon

Lodging: Nhat Ha 1 (District 1)

TPE (Taiwan) has got to be one of our favorite layover spots. What’s not to love about Hello Kitty is everything everywhere, Taiwanese dumplings and enough shopping to launch you into Asian pop star status? We happened to arrive on the very last day of the Soul Saigon Pool Party and dove right in for 50,000 VND per ticket (the electronic music might set you into a catatonic state, but you can’t complain about being in a roof-top pool, having a drink in hand, and climbing the rock wall).


Day 2: Saigon

Lodging: Nhat Ha 1 (District 1)

Meander through the Ben Thanh marketplace and score a pair of knock-off Ray Bans to get your trip started on the right foot. Being friendly but firm will get you far here.


Day 3: Saigon to Vung Tau

Lodging: Lan Rung Resort and Spa

Take a 1.5-hour speedboat from Ho Chi Minh to Vung Tau for 200,000 VND. Purchase your ticket at the dock or try asking your hotel (some have courier services).


Day 4: Vung Tau

Lodging: Lan Rung Resort and Spa

Visit Lan Rung Resort and Spa mid-week to avoid the weekend guest crowd. Do take advantage of their professional spa and opt-in for that much-needed Swedish massage. Nothing says happiness like a fresh durian smoothie poolside. New to durian? Don’t smell it; just eat.


Day 5: Vung Tau

Lodging: Lan Rung Resort and Spa

Climb 811 steps to Tuong Dai Chua Kito Vua (Jesus Statue) to catch a great view of Vung Tau along one of his arms. Don’t be shy about slathering a healthy serving of sunblock and topping it off with a hat. The silver lining can be found in the abundance of stone benches donated by devout worshipers along the entire route.

Vung Tau is one of the best places to learn how to ride a motorbike. Rent a bike or two right outside of the resort, and take in views of the coast, smells of squid drying under the sun, and sounds of merchants calling to one another from their stalls. For the intermediate or advanced riders– head up to the Vung Tau Lighthouse.


Day 6: Vung Tau to Saigon

Lodging: Nhat Ha 1 (District 1)

Take a final motorbike ride and savor the last bite decadent breakfast buffet before departing Vung Tau.

Craving something a little different once you’re back in the big city? Several Japanese restaurants can be found at the intersection of Ly Tu Trong and Truong Dinh. We were delighted to find Murakame’s Udon and Tempura and were even more excited to try their clam broth.


Day 7: Saigon

Lodging: Nhat Ha 1 (District 1)

Take yourself on a walking tour to the Central Post Office, conveniently located in the city center, where you can tack on other famous sites such as the Saigon Notre Dame Cathedral and Saigon Opera House. Venture to District 4 to grab dinner; they have a plethora of kick-back eateries at a fraction of the price.


Day 8: Saigon to Dong Hoi

Lodging: Muong Thanh Holiday Quang Binh Hotel

Take a VietJet flight from SGN to VDH (Dong Hoi) to get yourself situated close to Paradise Cave. Spend the evening relaxing at the hotel, and don’t forget to order a few Tiger beers at the pool.


Day 9: Dong Hoi to Hue

Lodging: Orchid Hotel

There’s something to be said about the allure of dark, bat-filled, mysterious caves. We organized a tour with 7km Paradise Adventure Tour for 2,400,000 VND per person, which included transportation to Hue afterward. They only allow one tour group per day, so this certainly makes for an exclusive experience.

Pro tip: These caves have no bathrooms, so do your business beforehand!


Day 10: Hue

Lodging: Orchid Hotel

Hue is jam-packed with historical sites and great food. With only a single day in the city, we opted to visit the Imperial City, paid homage to Thich Quang Duc’s (known for his honorable act of self-immolation to protest Buddhist persecution) at Thien Mu Pagoda, followed by lunch at Les Jardins de la Carambole. Make sure you try infamous Hue dishes such as Banh Khoai, Bun Bo Hue, Banh Loc Goi, and Com Hen. The word “banh” appears quite frequently in the Vietnamese language but manifests itself in so many different ways. But generally speaking, all “banh” dishes are delicious.


Day 11: Hue to Prao

Motorbike tour Hue Adventures in Prao

Try not to crash; within several minutes of departing for a 270km motorbike ride. Like a gang of comrades in Sons of Anarchy, we rode along the Ho Chi Minh road and took in the incredible scenery before stopping in for a night of rest in Prao Town.


Day 12: Prao to Da Nang

Lodging: Diamond Sea Hotel

Vietnam is composed of 54 ethnic groups, so it’s not uncommon to pass by small tribes throughout the country. We stopped for a visit with the Ta Oi (also known as Paco) tribe and continued on toward Da Nang. Our last stop took us up the Hai Van Pass to explore a crumbling bunker used by Americans during the war. Minutes after we set foot into the hotel, a steady rain poured from the sky for several hours. Use these moments as an opportunity for cooking classes, power naps, and slow contemplation.


Day 13: Da Nang

Lodging: Diamond Sea Hotel

Da Nang is home to several quarries, so it’s no surprise that their religious sites boast impressive quantities of stonework. Visit Lady Buddha and get lost in endless carvings and handiwork. Wrap up the evening with a visit to the preserved trading port, Hoi An. It is a beautiful place to visit during sunset but has become quite touristy. Prepare your pockets to pay inflated meal prices and try to get your hands on traditional regional dishes such as Mi Quang, Banh Beo, or Banh Xeo.


Day 14: Da Nang to Saigon

Lodging: Alagon Saigon Hotel and Spa (District 1)

Pay a visit to the Marble Mountains in the early morning before the heat reaches its peak. There are Buddhist grottos of all shapes and sizes, and you can even take a mini adventure detour by climbing the rocks within some of the caves. Vietnam Airlines has multiple, affordable flights flying every one or two hours from DAD (Da Nang) airport to SGN.


Day 15: Saigon

Lodging: Alagon Saigon Hotel and Spa (District 1)

Order up some 333 beers and pull up a chair curbside to people-watch on Bui Vien Street. It’s teeming with nightlife, bars, foreigners, and top-40’s music. Look around on the second-story balconies, and you’ll find the older folks are doing exactly the same thing from their flats.


Day 16: Saigon

Lodging: Alagon Saigon Hotel and Spa (District 1)

If you haven’t tried snails yet, the perfect place exists for you– The Gioi Oc, which literally translates to Snail World. Order up the Oc Len Xao Dua (sea snails in coconut milk) and watch the plate disappear before your very eyes.


Vietnam is fluid and ever-changing, just as the ocean tides do. We encourage you to explore outside of Saigon and sway your feet up in a hammock along a village road. Relish every moment of the breakfast buffet (we have yet to find any other place that offers such a spread), don’t be shy to ask for the price you want in the market, and finish everything that has been put into your bowl. Welcome the brash interactions in the big city– there is nothing quite as liberating as expressing yourself with energy too.

We hope this guide on Vietnam 16 Day Itinerary has helped you a lot. If you have anything to share, please let us know in the comment section.

Pack Like a Pro: The Ultimate Thailand Packing List for a Stress-Free Trip

Thailand Packing List: Sifting through endless vacation packing lists, looking for the right one for your upcoming trip to Thailand? Look no further! We’ve got you covered with a list and several unique suggestions to ensure you are prepared. After all, it would be no fun if you were irritable over leaving an important item behind (been there, done that). Leave it to us, and we’ll make sure you have a grin on your face while you are in “the land of smiles”! This gonna be the Thailand packing list has first appeared on your mind.

thailand packing list

Before getting into this article, we advise you to check eight things to know before going to Thailand; it will be handy when you visit Thailand.


Protect from mosquitos

If you are someone who attracts mosquitos, it can be quite bothersome, especially when you’re traveling. Mosquitos seem to have a knack for finding people who are particularly allergic to their bites. To avoid developing large, irregular bumps on your skin, it’s a good idea to pack several methods to keep mosquitos at bay during your trip. Bug spray is a great option for low-medium mosquito areas, and you can find environmentally friendly sprays in the market.


Pick the best clothing

When it comes to clothing, lightweight and breathable fabrics are your best bet in Thailand’s tropical climate. Pack clothes that can easily mix and match, so you can create multiple outfits without bringing too many pieces. Cotton or linen tops and bottoms are great choices, and you’ll want to bring comfortable walking shoes for exploring the cities, as well as flip-flops or sandals for the beach. Don’t forget to pack a swimsuit, a sunhat or cap, and a light jacket or sweater for cooler evenings. If you’re traveling during the rainy season, be sure to bring a rain jacket or poncho.


Capture your memories

Capture your memories of Thailand by bringing a camera or smartphone with a good camera. Don’t forget to pack the necessary chargers for all your electronics, as well as adapters for electrical outlets (if needed).


Vacation from your vacation

Not all vacations are created equal! Some of us may lounge poolside and at the beach, some may embark on arduous multi-day treks through the jungle, and some may spend their time sipping cold beers and sampling delicious street food. If you are the type of person that travels with a packed itinerary of excursions, foods to eat, and sights to see, you might just need to work in a bit of self-care too.

Dry shampoo will keep your hair oil-free and feeling fresh (which is especially helpful when out and about during a humid day.) Plan to do a face mask night (or two) to soothe your skin after a long day under the sun. Treat your hands and senses with a rich and calming hand cream right before a blissful nap. You might just need a vacation from your vacation…


Daily needs

Sun protection is essential in Thailand, where the sun can be intense and cause sunburns and skin damage. To protect your skin, it is important to pack good quality sunscreen with an SPF of 30 or higher. You’ll also want to bring your personal hygiene items, such as a toothbrush, toothpaste, shampoo, soap, etc. If you have any prescription medications, be sure to pack them in their original packaging, along with a copy of the prescription. Finally, bring a basic first aid kit with items such as band-aids and antiseptic cream.


Travel essentials

Carry a lightweight daypack or bag for carrying essentials while out and about. You’ll also want to bring cash and credit/debit cards, along with your passport and copies of important travel documents. Make sure you have travel insurance information and a water bottle to stay hydrated throughout your trip.


Efficient and short Thailand packing list 

If you are in a hurry, Sure! Here’s an efficient and short Thailand packing list.

Clothing

  • Lightweight, breathable tops and bottoms
  • Comfortable walking shoes
  • Flip-flops or sandals for the beach
  • Swimsuit
  • Sunhat or cap
  • Light jacket or sweater for cooler evenings
  • Rain jacket or poncho (depending on the season)

Toiletries

  • Sunscreen (SPF 30 or higher)
  • Insect repellent
  • Personal hygiene items (toothbrush, toothpaste, shampoo, soap, etc.)
  • Prescription medications (if applicable)
  • Basic first aid kit (band-aids, antiseptic cream, etc.)

Electronics

  • Camera or smartphone with a good camera
  • Chargers for all electronics
  • Adapters for electrical outlets (if needed)

Miscellaneous

  • Lightweight daypack or bag for carrying essentials while out and about
  • Cash and credit/debit cards
  • Passport (with copies)
  • Travel insurance information
  • Water bottle

One of the greatest parts about traveling to Thailand is getting the opportunity to explore its lush jungle. Did you know that over a hundred years ago, northern Thailand used to be covered in hardwood forests? Today, about one-fourth remains due to logging and development. If you plan on partaking in a trek or special adventure excursion, you may want to bring a few specialty items. Also, reading our 52 Creative Ways to Save Money for Travel will help you more.

Keep your valuables and electronics dry with a lightweight dry sack inside of your backpack. It’s so light that you will barely notice the weight at all! Bring a comfortable pack that will sufficiently carry items needed along your journey, and make sure that it’s durable. Extra points if it can double as your airplane carry-on bag. Do you have a GoPro? Take your photos to the next level with a waterproof telescopic hand pole to snap selfies while scuba diving or snorkeling.

You are all set for your upcoming trip to Thailand. Make sure you do these things in Thailand. Do you have any packing list must-haves for South East Asia? Do share!

52 Creative Ways to Save Money for Travel

Save Money for Travel: “How are you able to afford to travel to Japan so much? I hear it’s so expensive there!” These are questions we’ve been asked many times over. Cutting down travel expenses can be achieved easily by opting for hostels, casual restaurants, or cooking your own meals. There’s a lot that goes on behind the scenes in order to make our travel goals a reality.

ways-to-save-money-for-travel

Going on vacation doesn’t necessarily mean you have the green light to burn through your hard-earned cash. There’s no rule that says all travel needs to be in luxurious environments. In fact,  we’ve found that travel is more meaningful when we stumble across delicious street food or learn more about a place by reading up and becoming our own guide.

Budget traveling is a lot about learning how to stretch your dollar during and before a trip. Here we give you a few ways you can formulate a money-saving strategy that is so foolproof that even YOU can’t sneak out of it. Our 10 Golden Tips for Traveling Smarter will also help you more.


Start with the ground truth. What are you spending?

It’s hard to measure progress when you don’t know where the baseline is. That’s like a competitive racer saying they want to beat their score when they haven’t been tracking their time history. You won’t be able to uncover the best way to save money for travel unless you know what you are spending. For those of you that prefer to use your card, Mint is a powerful and free tool that aggregates your spending and even logs your assets and investments. Pick whatever method works for you. If you prefer logging your own expenses with a spreadsheet or keeping records on pen and paper– go for it!

Understanding your spending history will help you uncover certain “weaknesses” in your habits. Are you spending more than 20% of your income on dining out? Are your fixed costs (rent, mortgage, car payments, insurance, phone bills, etc.) eating up a majority of your paycheck? Are you spending more than you even have and going into debt every month? Once you are armed with your own ground truth, you’ll be able to create a specific strategy for yourself to save money fast.


Study yourself. What makes you tick?

Have you ever been around a group of kids and tried to convince them to clean up after themselves? You might have quickly realized that the “one size fits all” strategy doesn’t always work. Never assume people are motivated by the same things, which is why you should also take a custom approach to goal setting for yourself. Taking a look at your spending history might indicate you have a few vices, such as online shopping. Now, think about the root cause behind this behavior.

Are you shopping out of boredom? Are you an impulse buyer? Do you feel the need to buy the same things that your friends have? Or, take a hard look at your fixed costs. Why are you spending so much every month on your phone bill? Are you even utilizing your data plan to its full capability? Are you renting your apartment in the city because you’re afraid you’ll be bored in the suburbs? Reflect upon the things that make you tick because it will be a lot easier to curb certain spending habits when you understand the rationale behind them.


The classic horse and carrot on a stick. What’s going to make you gallop?

At this point, you may have a lot of ideas swirling around in your head. Perhaps you’ve realized you’ve been spending way too much on food and drinks because you keep getting roped into expensive social situations by your coworkers and friends. Maybe you’ve uncovered that you’ve been spending over $60 per month on subscriptions you don’t even use. You know what you need to change, but you aren’t sure what the best method for approaching it might be. Luckily, we’re about to discuss ways you can craft a game for saving money. So what kind of player are you?

  • Competitive: If you aren’t first, you might as well be last

Example: Get a group of friends together to see who can spend the least amount of money on lunch for an entire month. Track on a leaderboard.

  • Sprinter: Intense, short bursts of effort

Example: Challenge yourself to go 20 days, spending 50% less of what you normally do on discretionary expenses (non-essentials).

  • Milestone Maker: Weekly or monthly

Example: Only allow yourself to go (insert your weakness here) once every 3 months (instead of once a month as you currently are).

  • Habitual: Develop a daily routine or healthy practice

Example: Read a money-saving article every day, or when paying in cash, round up to the next whole dollar. Put the spare change in a jar for your travel funds.

  • Visually Inclined: Seeing your goal front and center

Example: Post a picture of your dream destination on your front door and on your phone screen. Every time you leave the house or look at your phone, you’ll be reminded of what you are trying to achieve.

  • Social Pleaser: If everyone knows you can’t possibly let them down

Example: Shout it from the rooftops. Let everyone know that you have vowed not to step foot in a mall for the next 6 months. If anyone catches you there, you’ll have to clean their bathroom (or another chore you despise).

  • Scarcity Seeker: How long can you go without?

Example: Refrain from buying anything full-price for as long as you can. This includes groceries, household goods, clothing, and electronics.

If any of the above-mentioned games sound fun to you, try implementing one or two for yourself! The key is to keep this money-saving challenge engaging. Once you start losing interest, it is time to switch it up.


Quick and easy changes to Save Money for Travel

  • Automation: Sometimes, it’s a lot easier to forget that you are saving money when it’s passive. Most employers have the option to split direct deposits by percentages. Have parts of your paycheck route directly to your savings and be pleasantly surprised in a few months. Some banks such as Bank of America, will even give you the ability to round up your spare change to the nearest dollar and deposit the extras into your savings account.
  • Constant Reminders: Repetition will eventually sink in. Create phone notifications, calendar reminders, and even sticky notes of your goals so you don’t lose sight of your mission. Encourage friends and family to hold you accountable by checking in frequently on your progress.
  • Old School: Make yourself a good old-fashioned piggy bank. Put your loose change and spare dollars inside. Or better yet; every time you save money by using a coupon, add the savings to your piggy bank.
  • Travel Mind: Think about the value of your money and translate that into your travel goals. For example, if you decide to rent a movie instead of going out every month, you might be looking at $120 at the end of the year (assuming a movie rental is $2 and cinema tickets are $12). That money could easily float a portion of a domestic flight, an adventure excursion, or even pay for an entire week’s worth of lodging in Southeast Asia. How about cutting cable? You might be spending as low as $40 per month on cable with your internet bundle. That’s still $480 per year, which could be a ticket from San Francisco, USA, to Lyon, France. I’m serious! I just spent $403 on my flight with Air Canada.

Now that you have a solid baseline for saving money, there are endless ways you can stretch the value of your hard-earned dollar.


Consider Doing this yourself…

  • Eyebrows, Facials, Waxing, Nails
  • Cleaning, gardening
  • Haircuts
  • Learning new skills through online courses or books
  • Repairing broken items instead of buying new


Decrease the frequency of…

  • Dining out
  • Ordering drinks and desserts at restaurants
  • Haircuts (especially avoid hair color)
  • Buying new electronics
  • Buying new clothes unless you truly need it


Renegotiate your rates…

  • Phone plan
  • Internet plan
  • Cable plan
  • Auto insurance


Avoid large unexpected expenses by…

  • Routine health and dental check-ups
  • Regular oil changes and car maintenance
  • Maintaining your home on a regular basis
  • Shopping without a specific list
  • Abiding by driving laws on the road and avoiding tickets


Reconsider whether you need it and eliminate it if not…

  • Cable TV
  • Gym memberships
  • Merchandise subscriptions, magazines, etc.
  • Email subscriptions to your favorite stores
  • Auto-saved credit card information to make it slightly more annoying to make online purchases
  • Late, banking, and interest fees
  • Brand name items versus generic ones
  • Apartment rental cost


Good savings practices…

  • Did you get a rebate, bonus, or tax refund? Reward yourself with a small treat (or a simple pat on the back) and save the rest
  • Audit your home energy and water usage
  • Use your own refillable water bottle (especially at the airport)
  • Make coffee at home instead of buying it
  • Practice resourcefulness and the act of reusing when possible
  • Never spend beyond your means
  • Pick up a side hustle to fund your travels


Questions to ask yourself…

  • Can I borrow versus buy?
  • Can I buy used versus new?
  • Could I find it on Craigslist?
  • Can I wait until it’s on sale?
  • Are there leftovers from this meal that I can eat later?
  • Could this go under a tax shelter?
  • Can I volunteer at this event to get free admission?
  • Are there hobbies I’d like to pick up that are low-cost?
  • Will I survive if I buy this item in two weeks or next month?
  • Would I benefit more from a travel-incentivized credit card versus the one I have now?
  • Do I really need to live in a place this big in this particular area?
  • Am I being wasteful?
  • Can I spend time with my friends and family without using money?
  • Can I walk there, carpool, or use public transportation?


Now that you’re on the way to Save Money for Travel…

A word of caution– don’t overwhelm yourself by trying to tackle everything all in one day or even one week. Good money-saving practices take time, and there will also be an adjustment period, especially if you’ve been used to doing things a certain way for so long. Instead of going “cold turkey” on activities you enjoy, simply reduce their frequencies. You want to keep yourself excited and engaged about your money-saving goals instead of seeing them as your “ball and chain”.


Create positive associations with these tips on saving money, and don’t forget to celebrate little wins along the way. It is important to appreciate and value the possessions we currently own instead of always seeking more. Experiences can provide greater satisfaction and happiness compared to material possessions. Looking ahead, we will cherish the memories of exploring places like Chiang Mai in Thailand or Caving Along The Wild Atlantic Way in Ireland. But we will unlikely regret missing out on any TV shows due to canceling our cable subscription.

Wishing you good luck on your journey towards saving money, as exciting opportunities await!

If you don’t know where to start? Check out 17 Bucket List Ideas From World-Class Travelers. It will help you a lot.